Create your first site
A site is the place work happens — shifts, patterns, check calls and client billing all hang off one. Creating a site is a five-step wizard covering details, contact, geofencing and optional coverage, and it finishes on the site's own configuration screen. Only the name and the postcode are genuinely required, and the client a site bills to is set afterwards rather than during.
Who can create a site?
An Admin, and in practice only an Admin.
Sites appears in the header under More, and that menu entry is shown to Admin, Manager and Control. The create form itself has no role check either. But the route that saves the site refuses anybody whose role is not exactly Admin, with a bare Forbidden.
The consequence is worth knowing before you delegate the job: a Manager can open the wizard, fill in all five steps and only discover the problem when Create Site fails. Neither the permission catalogue's sites.create.organization key nor a Manager's grant of it changes this — the route does not read permission keys at all.
What do you need first?
Nothing but a name and a postcode. Everything else on the wizard, including the client, the contact and the coverage, can be added or changed later on the site's configuration screen.
Two things are worth deciding up front because they are awkward to change.
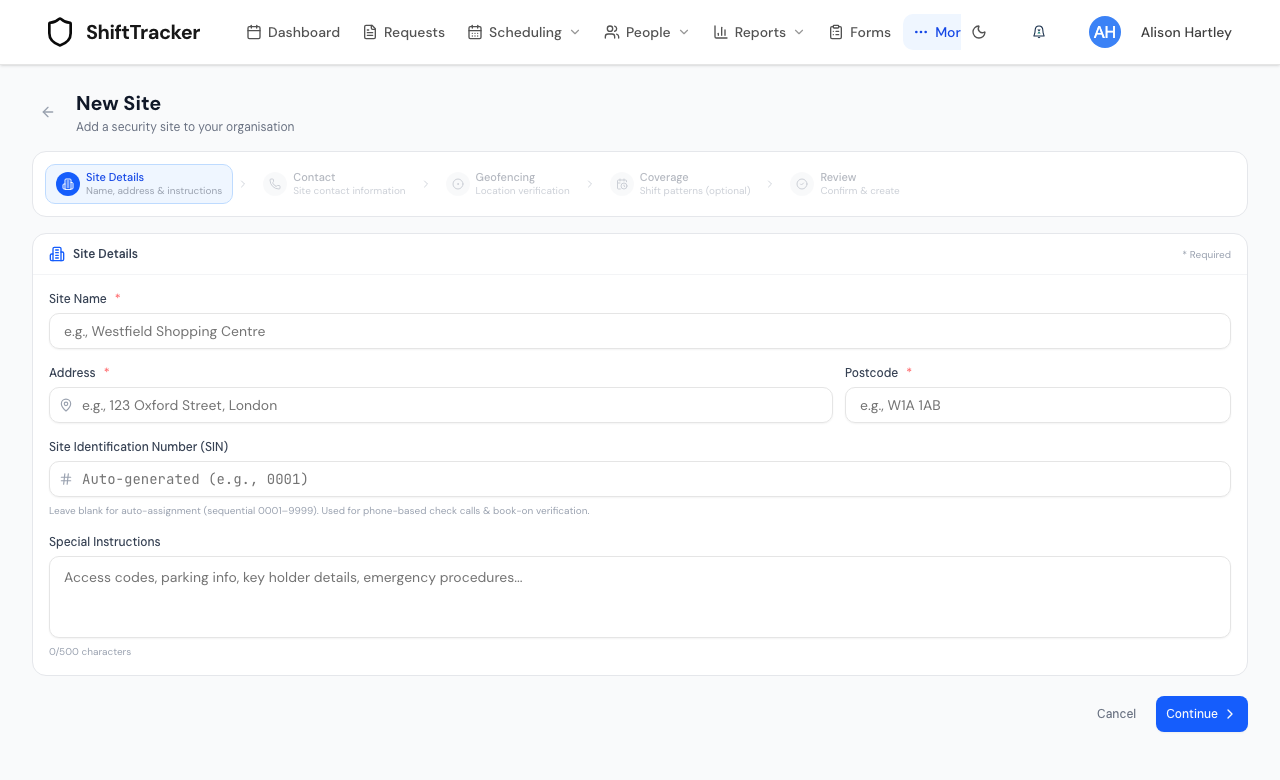
The SIN, or Site Identification Number, is a 1-to-4 digit code unique within your organisation. Leave it blank and the next free number is allocated in sequence, zero-padded to four digits — 0001, 0002, and so on. Type one and it is padded the same way, so 7 is stored as 0007.
Geofencing is easier to set up here than to repair later. See the caution below.
How do you create one?
- Go to Sites and press Add Site. On an organisation with no sites yet the empty state offers Create Your First Site instead; both lead to the same wizard, headed New Site.
- Site Details. Fill Site Name, Address and Postcode — all three are marked required by the form, and the postcode box upper-cases whatever you type. Site Identification Number (SIN) and Special Instructions are optional. Press Continue.
- Contact. Contact Person, Phone Number and Email Address, all optional. The phone and the email are format-checked if you fill them and ignored if you do not. Press Continue.
- Geofencing. Off by default. If you want it, turn on Enable Geofencing, press Auto-detect from address to fill Latitude and Longitude, set Geofence Radius, and choose which of Check Calls, Book On and Book Off it applies to. Press Continue.
- Coverage. Optionally pick a staffing tier — 84 hours/week, 108 hours/week or 168 hours/week — or take Skip — set up shift patterns later. Nothing is pre-selected, so leaving the step alone is the same as skipping it. Press Continue.
- Review & Create. Check the summary and press Create Site.
You land on the site's configuration screen, which carries five tabs:
| Tab | What it holds |
|---|---|
| Overview | Shifts, contacts and staffing |
| Schedule | The schedule builder |
| Employees | Assigned employees |
| Settings | Site details, check-call settings and geofencing |
| Performance | Metrics and coverage |
What do the coverage tiers actually create?
Shift patterns, one row each, all with one person per block and the role Security Guard.
| Tier | Patterns created |
|---|---|
| 84 hours/week | Day 07:00–19:00, every day |
| 108 hours/week | Weekday Day 07:00–19:00 Mon–Fri, Weekend Day 07:00–19:00 Sat–Sun, Weekend Night 19:00–07:00 Sat–Sun |
| 168 hours/week | Day 07:00–19:00 and Night 19:00–07:00, both every day |
They are a starting point, not a commitment — every field is editable afterwards in the pattern builder, covered by Recurring shift patterns.
Creating the patterns is a second request, made after the site already exists. It needs the shifts.edit.pattern_days permission and an active subscription, neither of which site creation itself requires, and it counts against your plan's pattern quota. If it fails, the site is still created and you are told so: Site created — add coverage in the pattern builder.
What do you set afterwards?
The client. A site is created with no client, and the field is not on the wizard at all. Set it on Settings → Client, where the default reads Unassigned. It is what makes the site visible in the client portal, and it saves as soon as you choose it rather than waiting for the save bar.
The check-call pattern. Also on the Settings tab, under the Check-call heading, labelled Check Call System. See Configure check-call patterns.
Everything else on Settings. Press Edit to unlock Site Name, Address, Postcode, Contact Person and Contact Phone, then Save. Operating hours and Minimum Staffing are not editable — both read Calculated from shift patterns.
If it goes wrong
"Forbidden" when you press Create Site. Your role is not Admin. Nothing in the wizard warns you earlier.
"SIN {n} is already in use". Another site in the organisation holds that number. Pick a different one, or clear the field and let it be allocated.
"Maximum site limit (9999) reached for this organisation". Every number in the SIN range is taken. This is the only hard ceiling on site count — your plan's site limit is displayed on Settings → General but is not enforced when a site is created.
A later edit refuses to save with "Geofence coordinates are required when geofencing is enabled". The wizard lets you finish with geofencing switched on and no coordinates set; the edit route does not. Run Auto-detect from address before enabling it, or turn geofencing off, save, then set it up on the Settings tab.
You cannot set a radius above 1 km. The wizard's slider stops at 1000 metres. The same control on the Settings tab goes to 30,000 metres, which is also the server's limit, so set a wider radius after creation rather than during it.
Special Instructions ignores the character counter. The 0/500 characters line under the box is decoration — there is no limit on the field and none on the column behind it.
"Site ID" is not actually checked. The SIN is shown to workers as Site ID, and the check-call settings offer Require Site ID. Neither the web portal nor the mobile app sends the number a worker sees, and no route compares it against anything. Treat the SIN as a reference code, not as a credential — the PIN is the credential.
Related
Last updated 2026-08-13